Selfhosting and your Homeserver - E04 - Update Q4/2023 new Server Build
After more than four years on my previous Hardware it was time for an Upgrade. In this article I am going to describe my process and choices.
Hardware #
After initially settling on a low power passive cooled solution for my previous build, I wanted to change things up this time. I initially included headroom for future proofing in the last build - managing to get easy four years of lifetime out of the components. This time I target the usual six years I plan of usage time for my desktops. At work, I managed to collect experience with Intels little-big Chipdesign consisting of performance and efficiency cores, in my Laptop powered by an i9-12900H. This brought me to the idea of building a server more powerful but at the same time with sufficiently little power consumption.
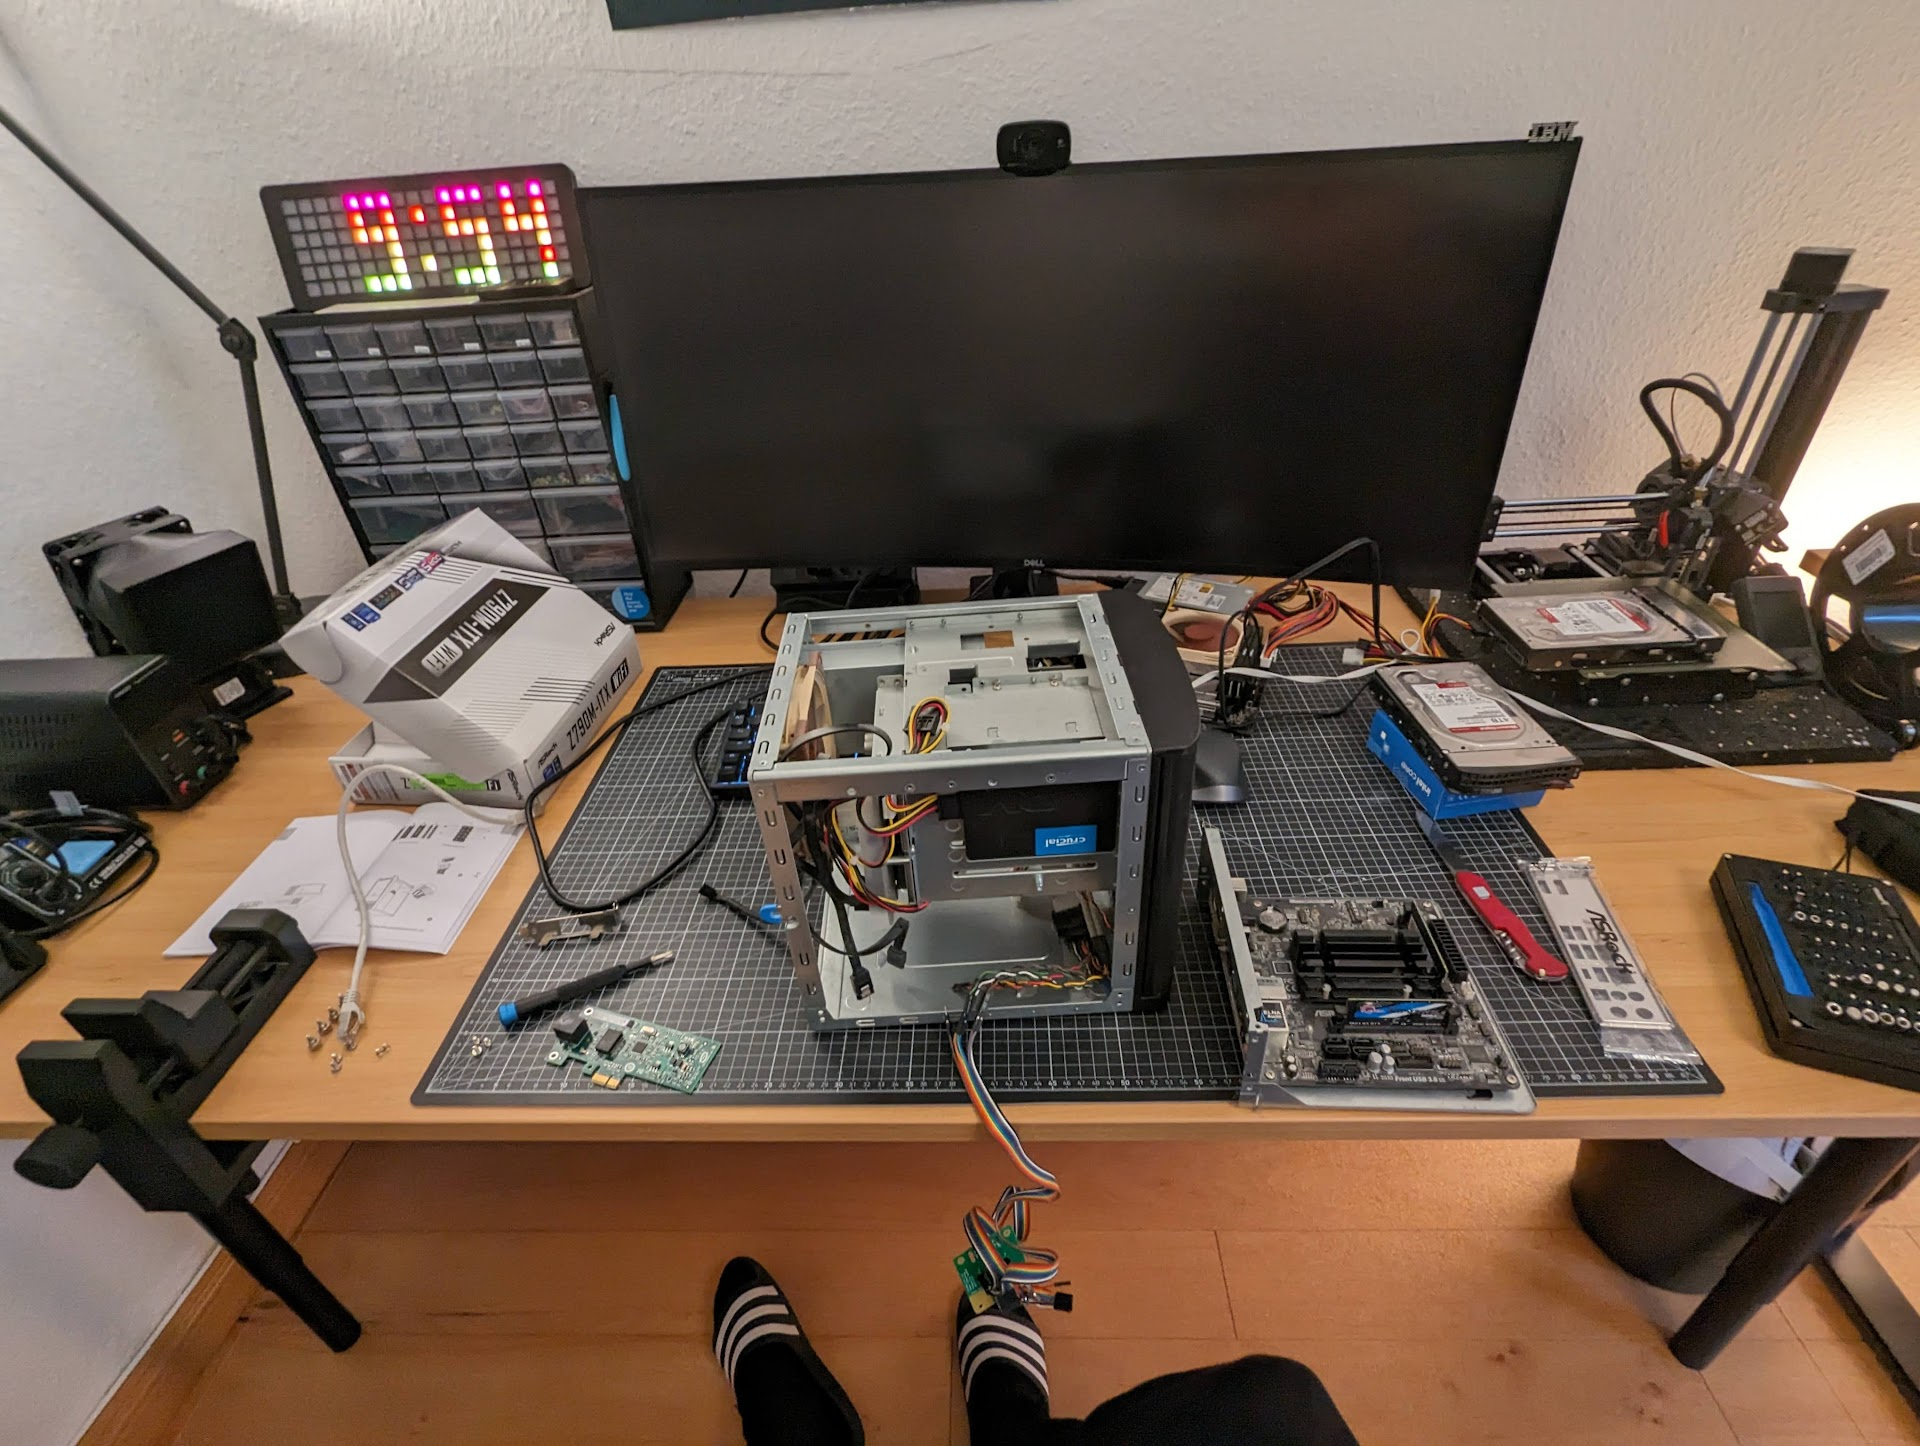
I decided to reuse my cube ITX-Case and the Server HDDs. All other components are exchanged. I managed to buy all of them at sale, keeping the overall cost to my set limit.
The Chassis is still the Supermicro 721TQ-250B. The 250B in the model-number indicates the 250 Watt Flex-ATX PSU. Which unfortunately was not sufficient for the new build.
I decided to settle on the Supermicro PWS-353-1H as an alternative. Here any other Flex-ATX 350 Watt PSU with 80+ Gold rating from a renowned brand would have been sufficient.
The HDDs are still a pair of Western Digital WD Red Pro 4TB models.
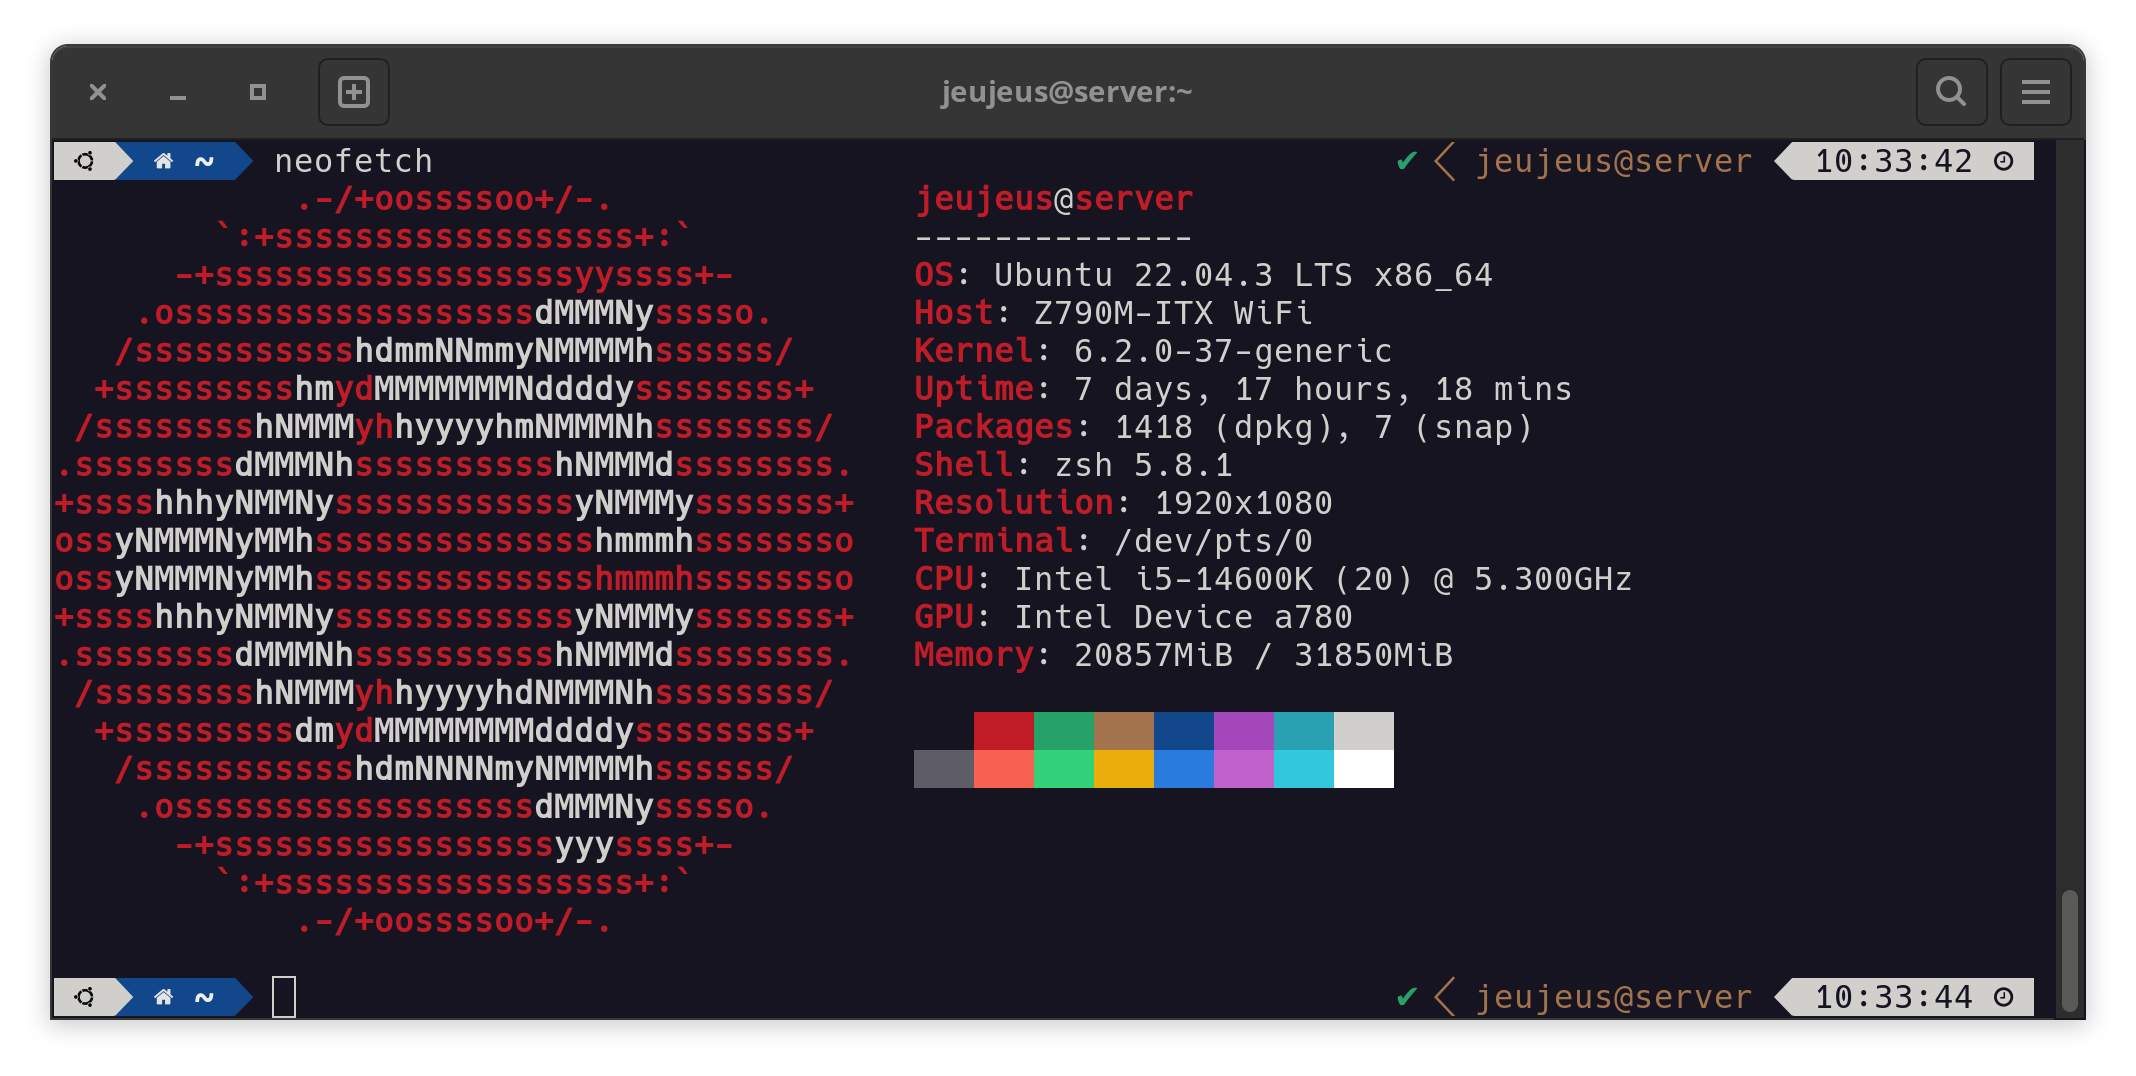
As a plattform I settled on Intels newest Z790 chipsets, due to the lack of choices for this form-factor. I would have chosen a cheaper chipset, but the ASRock Z790M-ITX/WIFI provides anything I looked out for. Built for Intels 13th and 14th Processors, supporting DDR5 as well PCIE Generation 5. Also, it supports two passive cooled PCIE Gen 4 NVME SSDS as wells as one 2.5Gb and one 1Gb Intel NICs. This allowed me to utilize the Onboard NICs making room for an additional half height (due to my case) Expansion card down the road.
I went with the all new and shiny Intel i5-14600k which is admittedly overkill since I will not utilize any overclocking. But I went on the bet of hopefully receiving one more year of official support than the architecturally equivalent 13th gen Plattform. At the same time this processor boasts 6 Performance cores, that even in my limited thermal headroom situation will provide boosts over 5Ghz. Additionally, 8 Efficiency cores help to keep the power consumption low. Also, the processor supports all the Instruction sets I need (AVX for Encryption) and a quick onboard Graphic with Hardware encoding for AV1 and consorts.
Complementary I settled on the bang for the buck RAM in the form of a 32GB G.Skill Flare X5 schwarz DDR5-6000 DIMM CL30 Dual Kit. This provides me with fast RAM and enough Headroom in terms of space for lots of ZFS Caching.
My choice of suitable coolers was quite literally limited by my case, as can be seen in the image below.
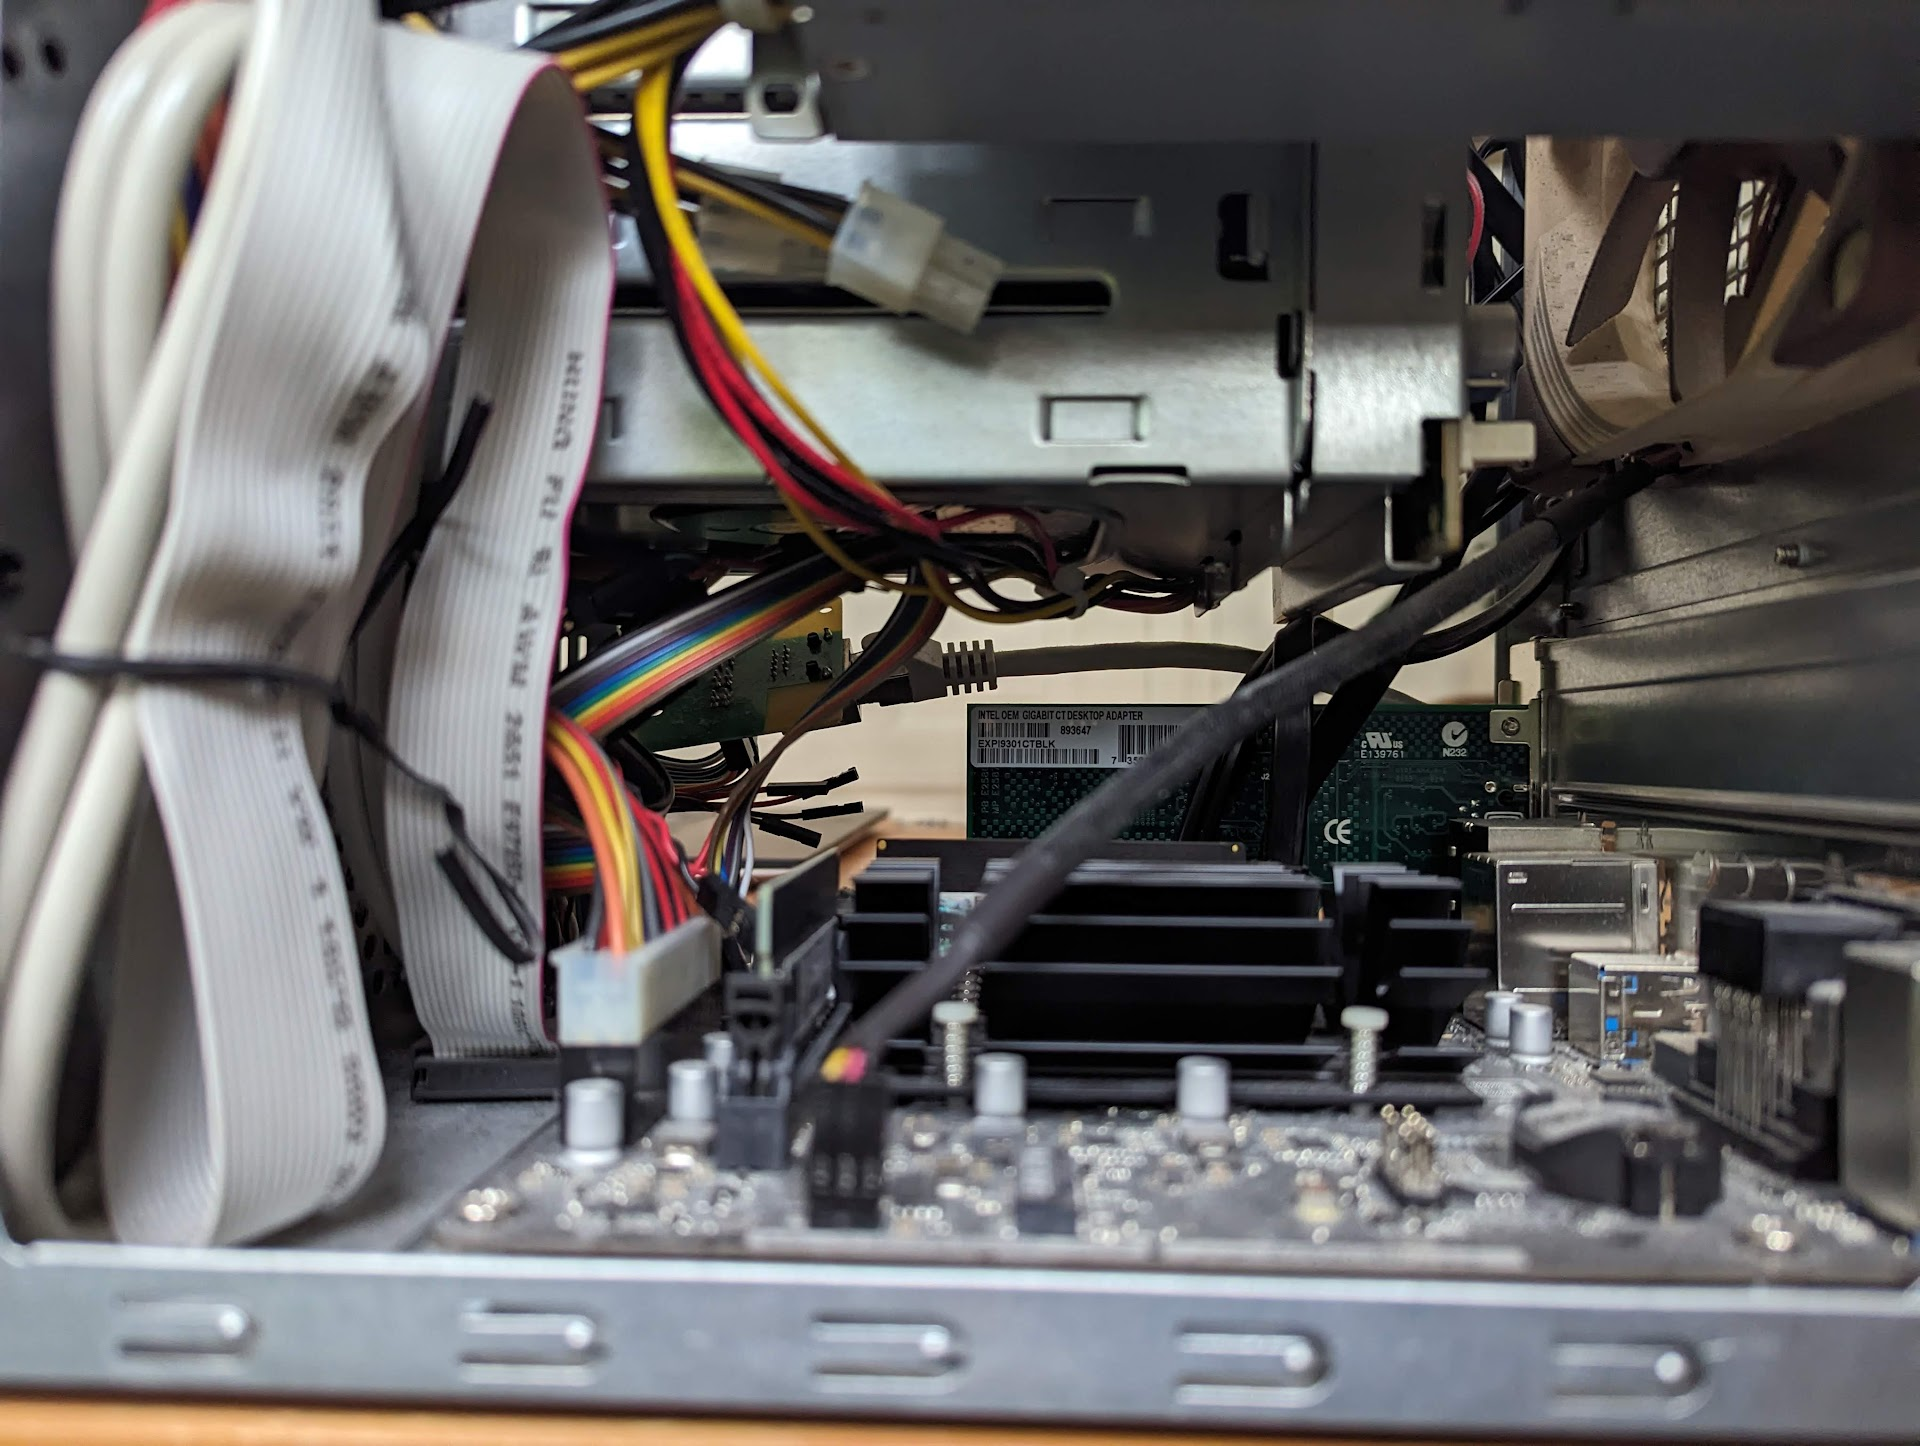
Therefore, I opted for the beefiest cooler that still fits, the Noctua NH-L9i-17xx. This provides the maximum cooling capacity in this narrow space.
For storage, I went all out and bought the top of the line Samsung 990 pro 1TB model. This ensures sufficient r/w performance and iOPS, especially for all the deployed applications.
Software #
My choice of Software is pretty straightforward. I opted to built onto of my previous setup, whilst ironing out all remaining improvements.
For the OS I opted to use Ubuntu 22.04.4 LTS in the Desktop edition, as it provides native encrypted ZFS root FS support. Afterward it is easy to convert it over to the Server edition by removing and installing (meta)packages.
With Uptime, S.M.A.R.T, Health/Metrics/Tracing, ZFS, apt, Docker -monitoring in place the servers resilience is validated.
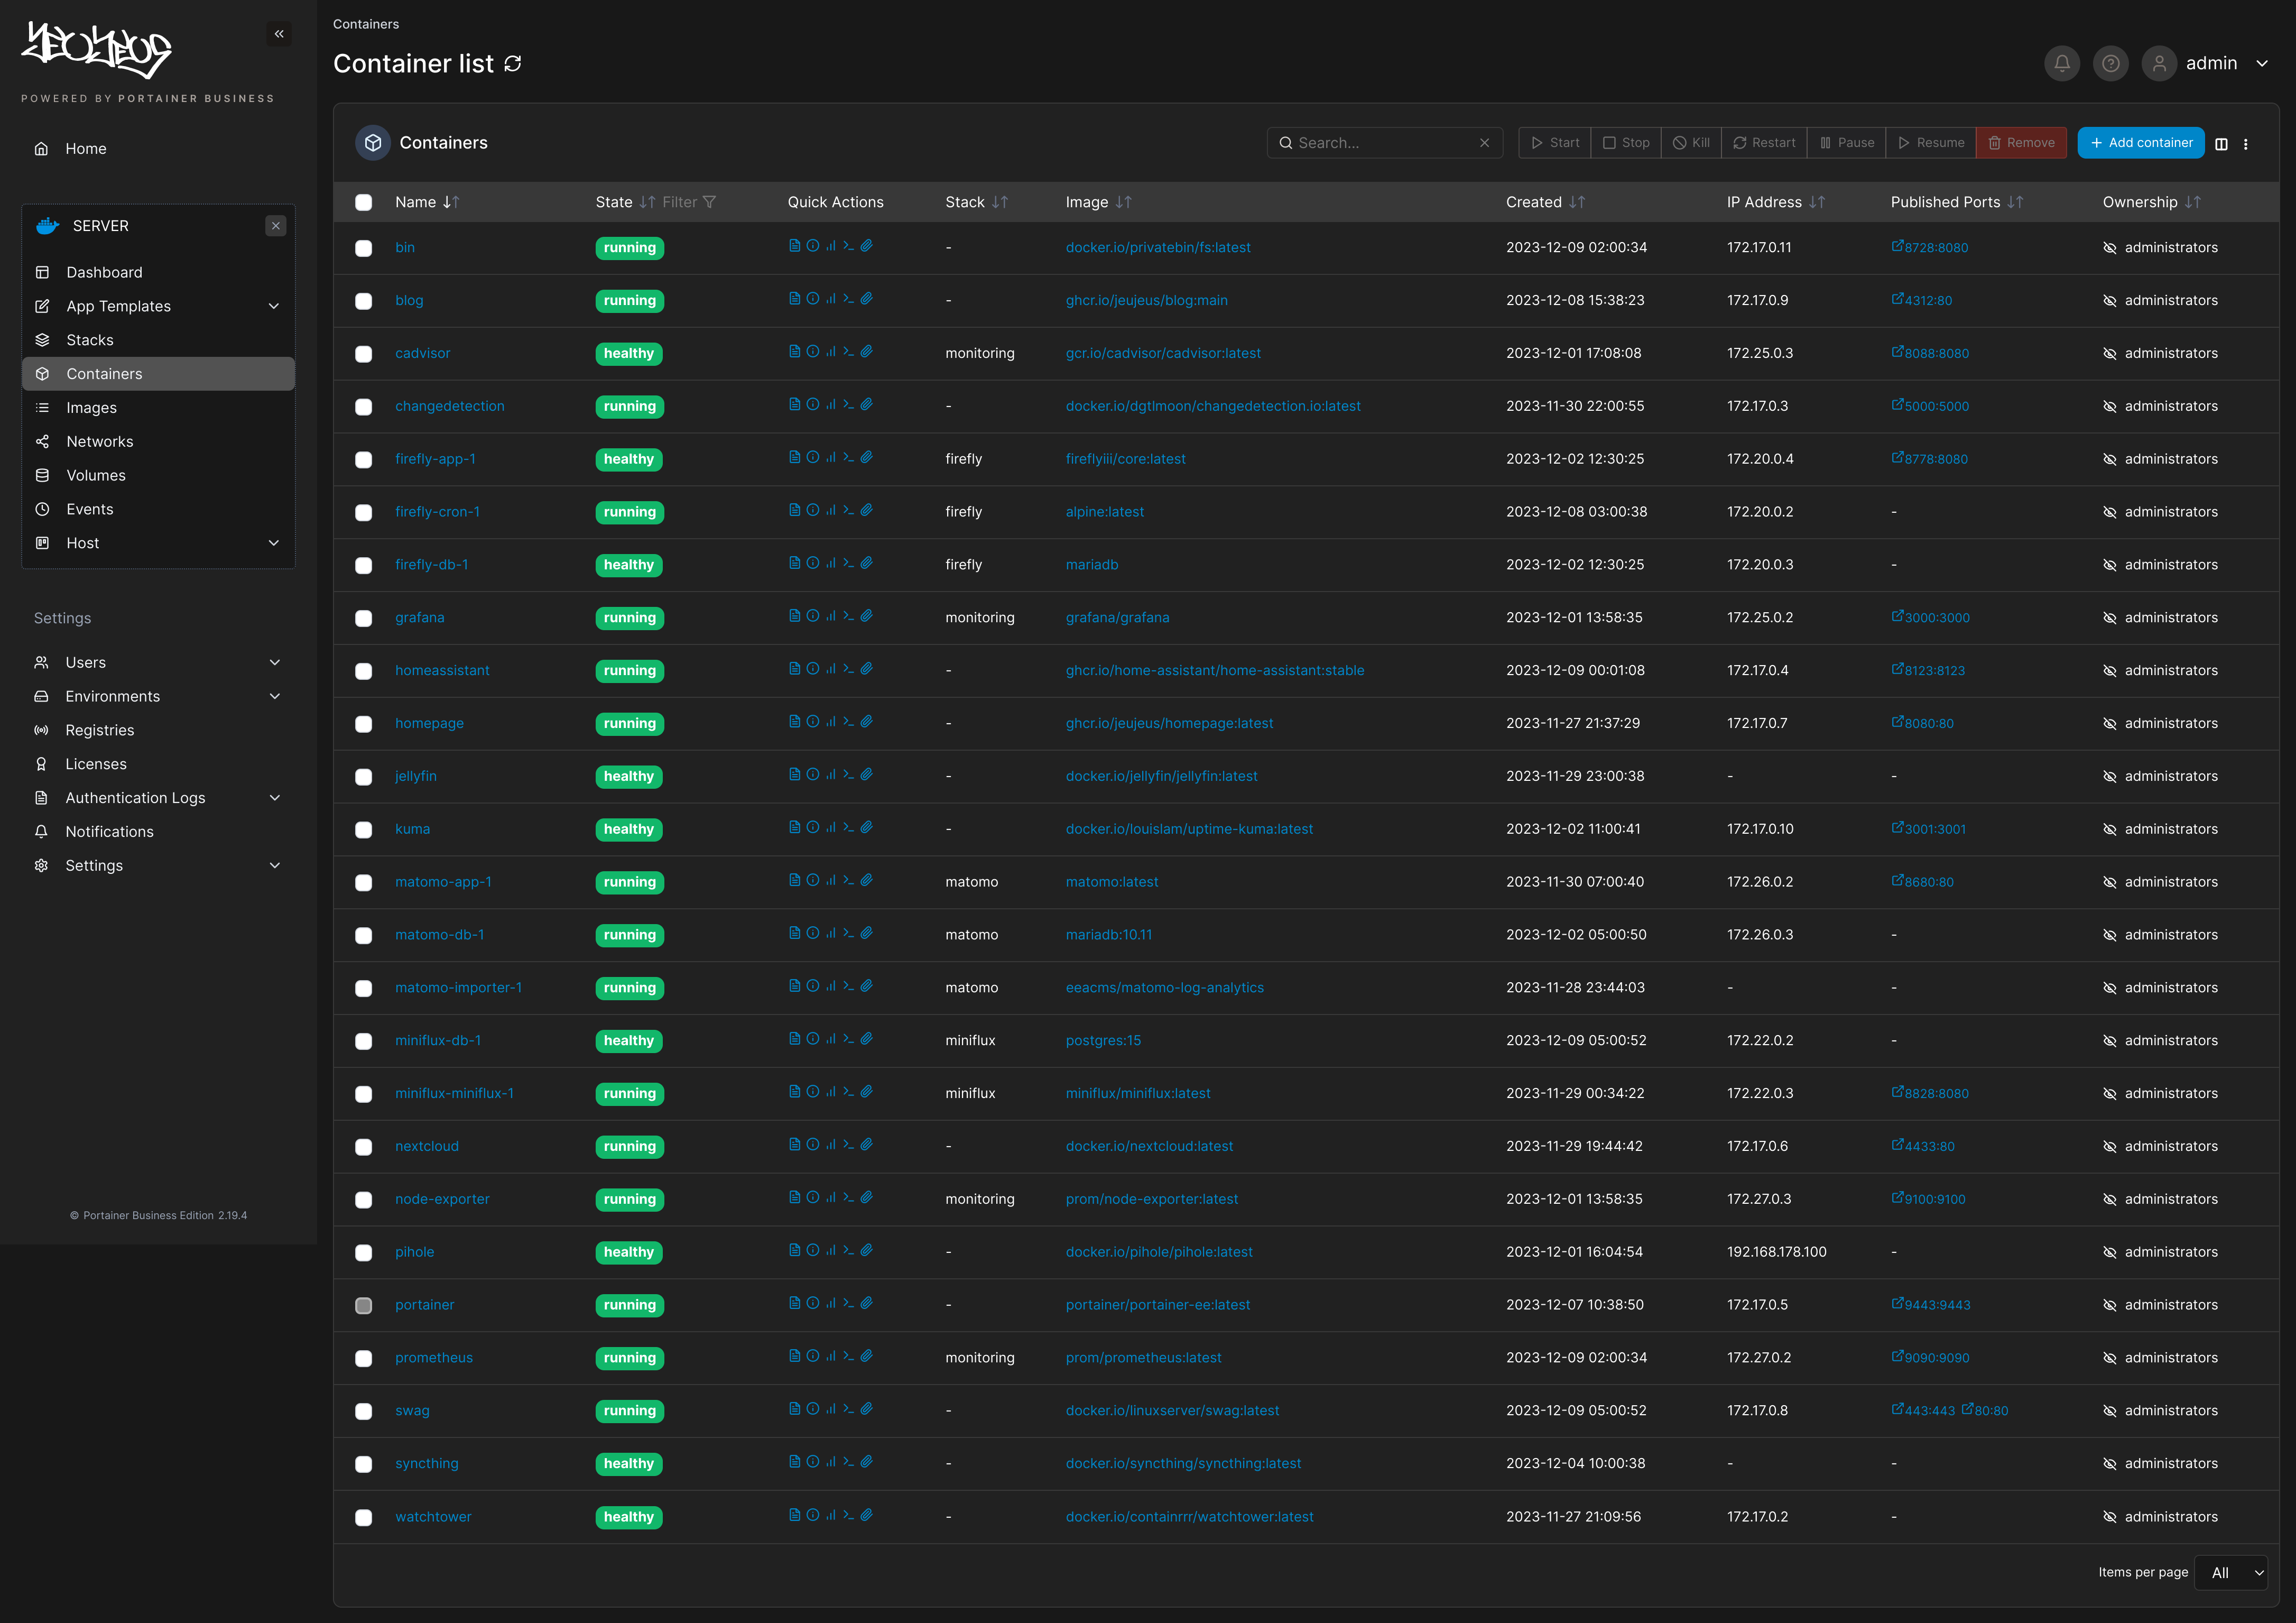
All services Docker services were migrated, with the Monitoring/Metrics/Tracing extended.
ZFS as storage plattform allows for Encryption of all Disks.
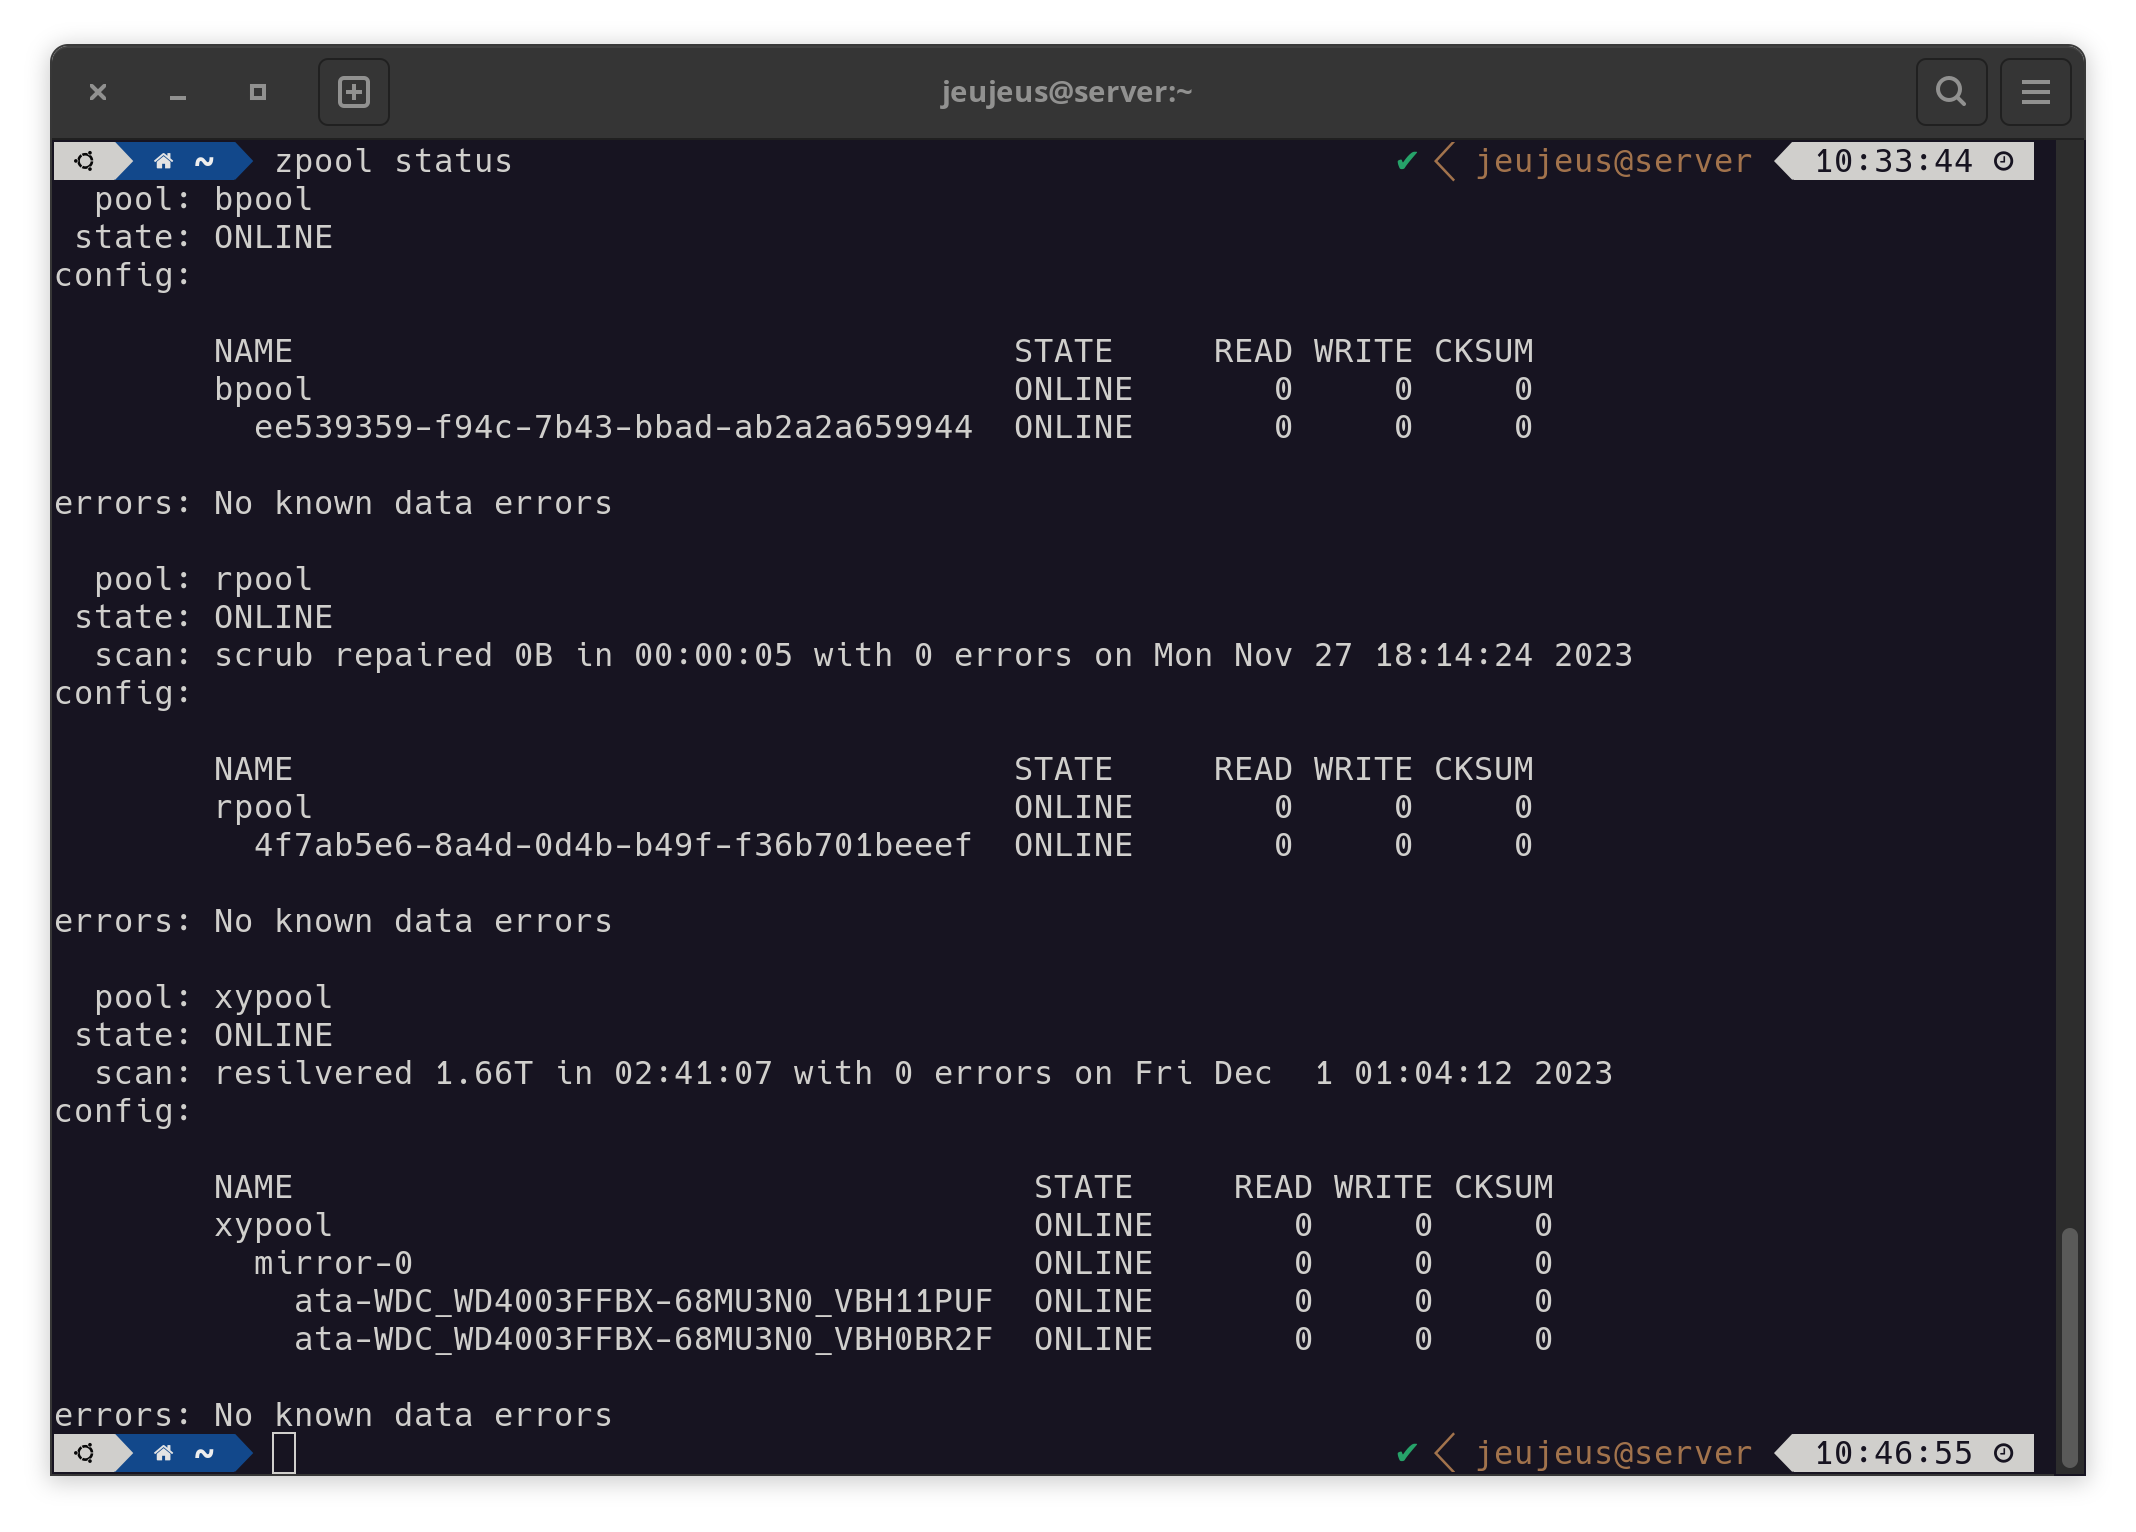
The xypool (Data) is unlocked via a file, stored in the rpool (root fs, docker). The rpool is unlocked via KVM (either from the local Network or via Wireguard VPN from anywhere).
Speaking of Docker, ZFS is configured as the Storage driver
{
   "storage-driver": "zfs"
}
This makes my Docker setup integrated in the ZFS snapshot configuration, allowing rollbacks from 15minutes to days.

I am looking forward to years of use, ideally mostly relying on set and forget.
Migration #
Ending this article I want to quickly shed light into the migration:
The migration from the old to the new server went pretty straightforward. I built the new Server on top of the Mainboard box and set up the OS and its initial configuration. I gave it a static IP in the DHCP server. After that setup I removed one disk from the raid on the old server and installed it in the new one. That enabled me to migrate the running Docker Containers via Backup to the new Server. After I replicated all services from the old server on the new one, i was able to swap their IPs. This made the new server the live one. Following up, I disabled the old server and rebuilt the ZFS mirror in the new server. With that done, I needed only a short downtime to physically migrate the new server to its case. Afterward the migrations was complete.